
Quick answer: Auto Split takes a Meshy model and cuts it into separate, watertight parts sized to fit your build plate — ready to export straight to your slicer. It works on Standard, untextured (draft) models generated with Meshy 6 and Meshy 7. A full split previews in about 40 seconds, and you can re-split as many times as you like before committing.
What is Auto Split?
In Meshy, Auto Split is a one-click feature that breaks a 3D model into printable parts. Instead of manually cutting a model in Blender or a slicer and repairing the holes that creates, Auto Split finds the model's natural structural boundaries — like where a neck meets a torso, or a wing meets a body — cuts along them, and automatically caps every cut surface so the parts come out watertight and ready to print.
How Auto Split Works
Fast preview — the full split renders in about 40 seconds, and what you see is the same geometry you'll export, not a placeholder.
Smart cuts — boundaries follow the model's geometry instead of arbitrary planes, and parts are sized to fit a standard build plate.
Watertight parts — every cut surface is automatically capped into a closed mesh, so parts are ready to slice without manual repair.
Re-split anytime — if the first result isn't what you wanted, you can re-run Auto Split. Re-splitting doesn't destroy your original draft.
Here is more info on how to use it:
Instructions
First, create your model using a text or image prompt. Below your prompt, toggle on the "Split" option:
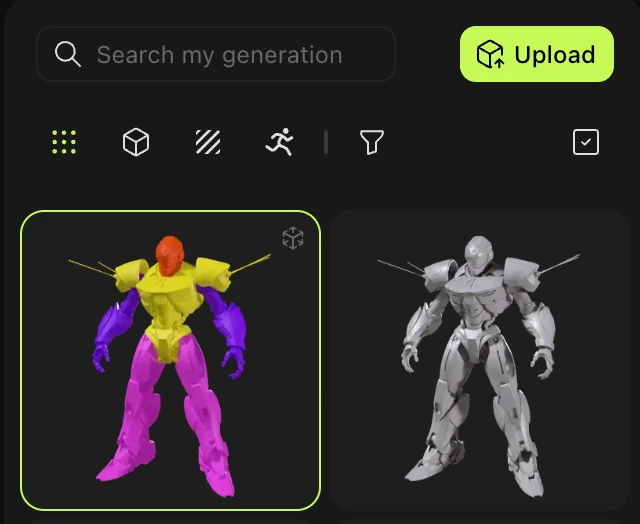
Then, click "Generate". Two models will generate: the first is a regular version of your model, and the second is your model color coded by the parts that can be split up:
Click on the color-coded model, and you'll see this in your model viewer:
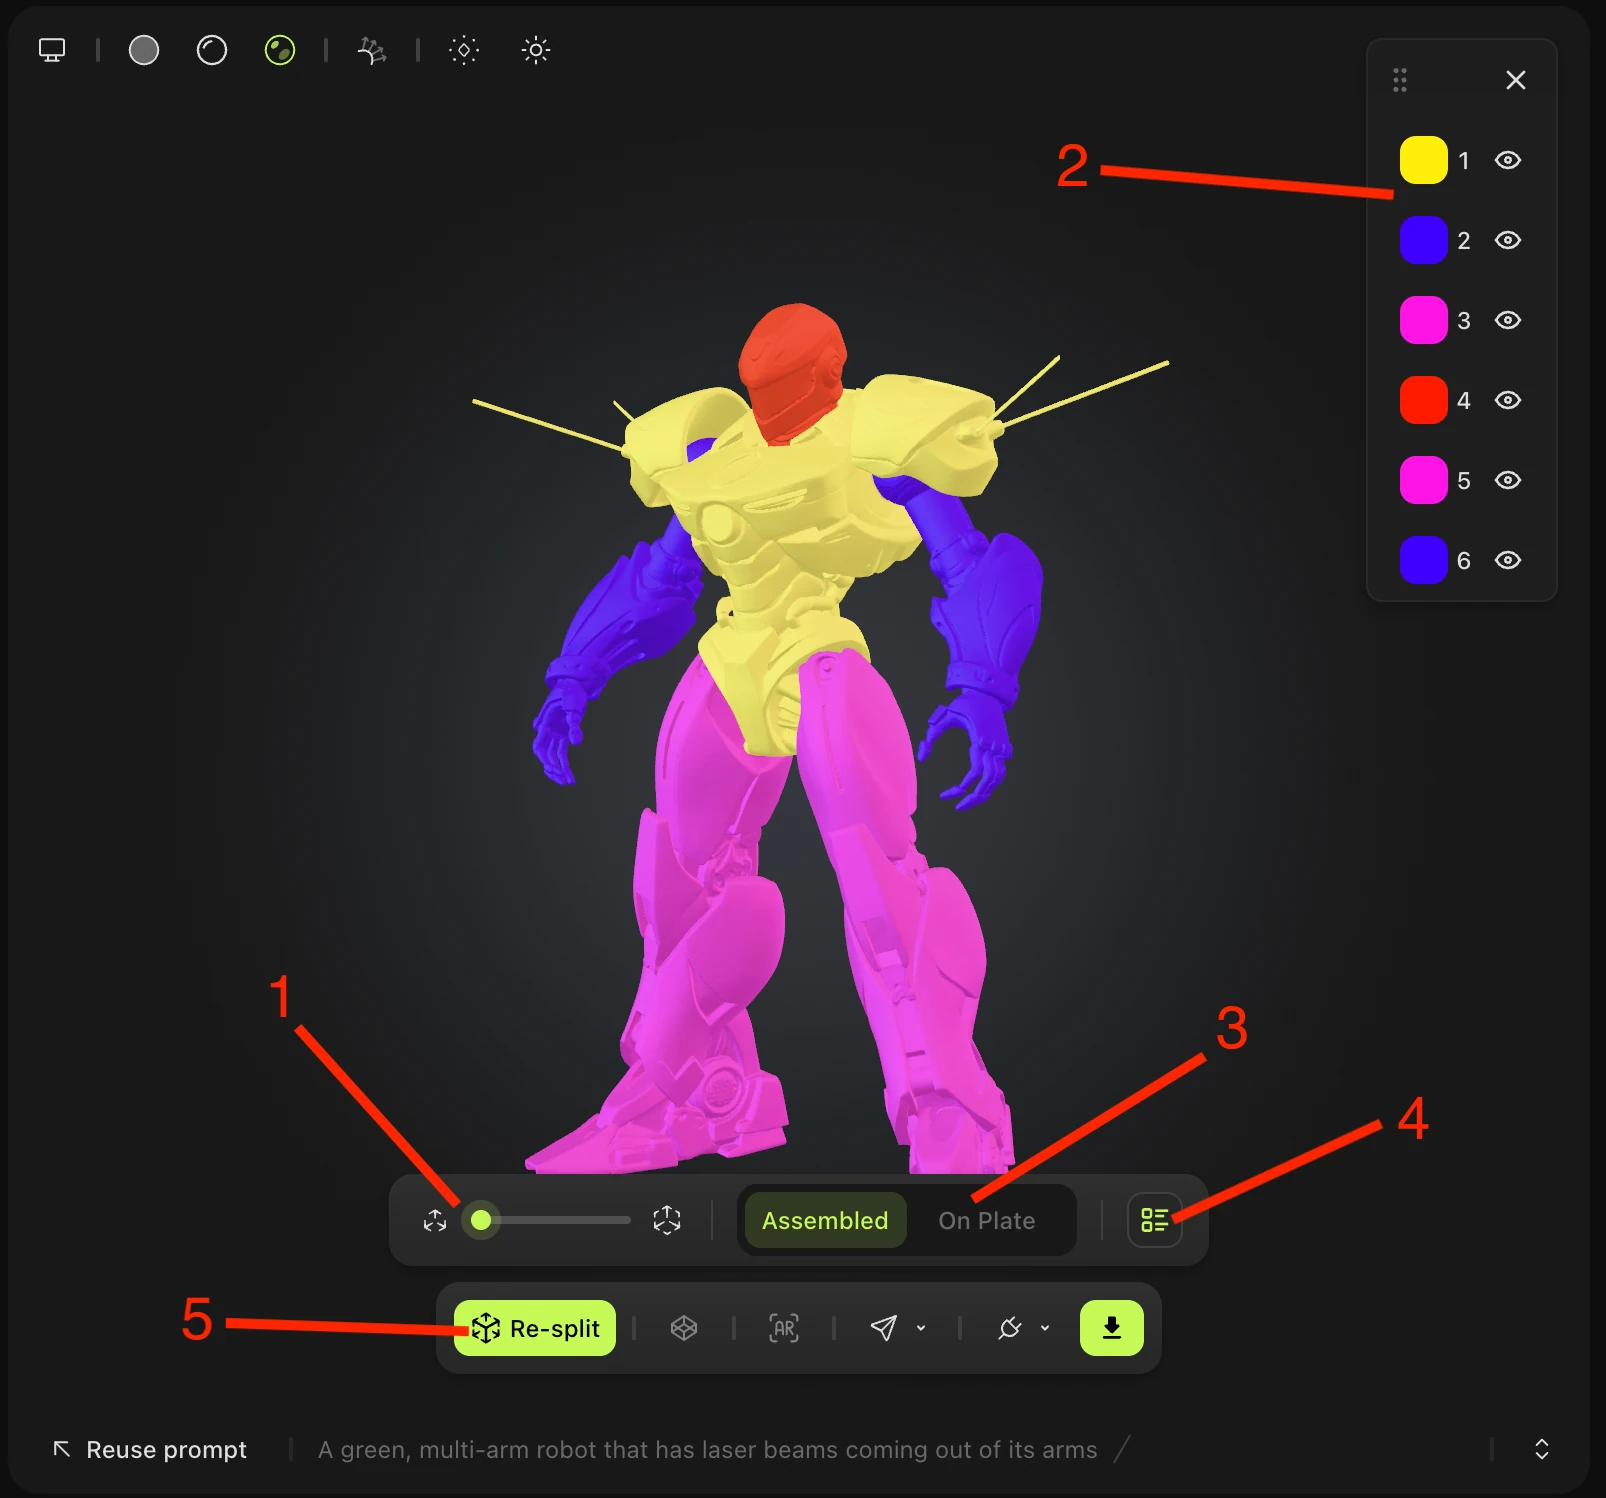
There are various features to this viewer:
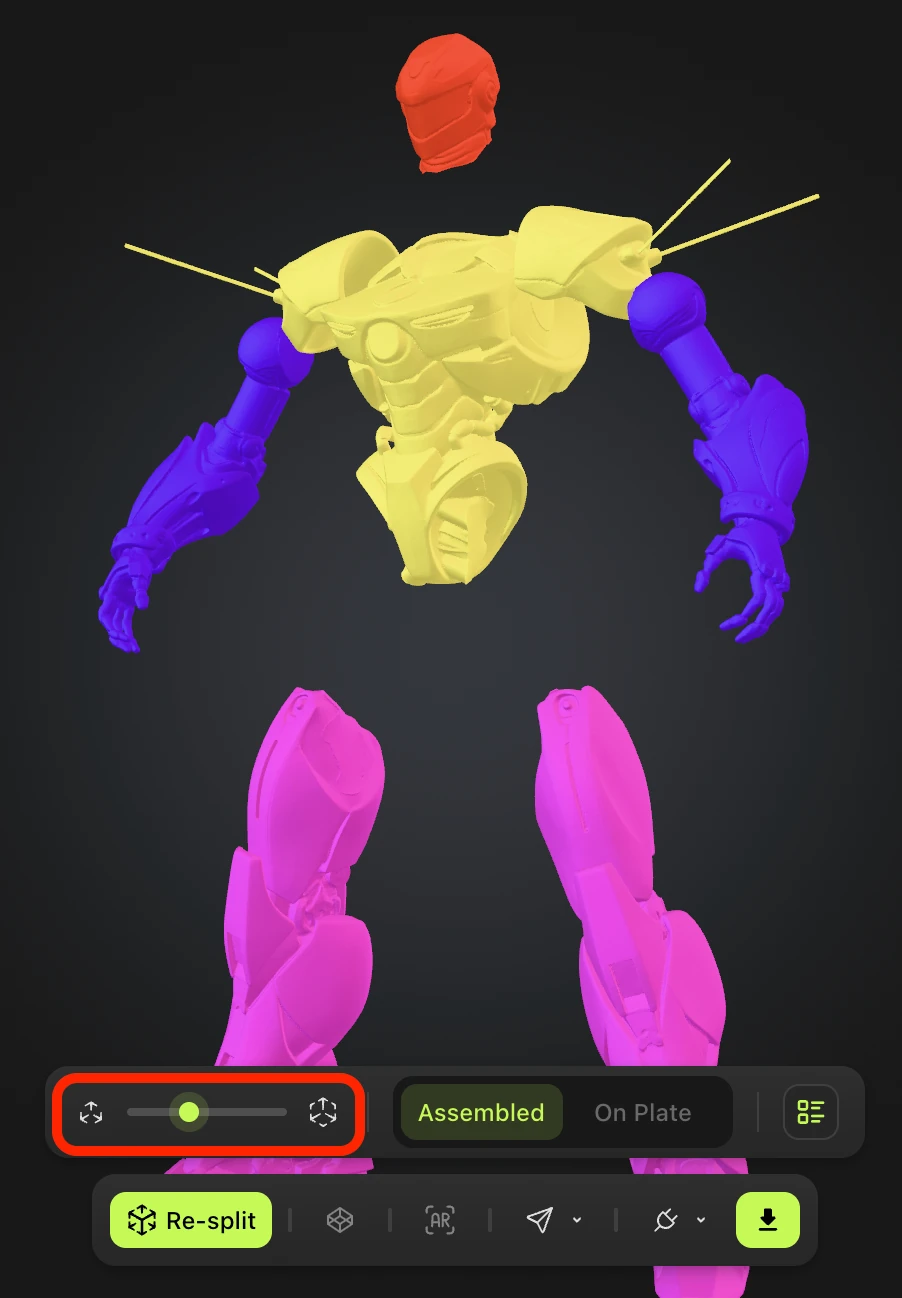
You can slide up and down this scroller to see the parts of your model come part, and back together again:
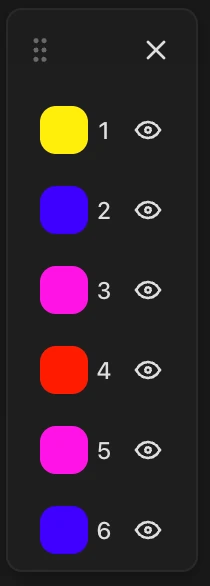
In the upper right corner, the color coding allows you to highlight and select the corresponding parts of your model based on color. Users can click the color to see an outline of the part on the model, or the eye icon to hide the part completely:
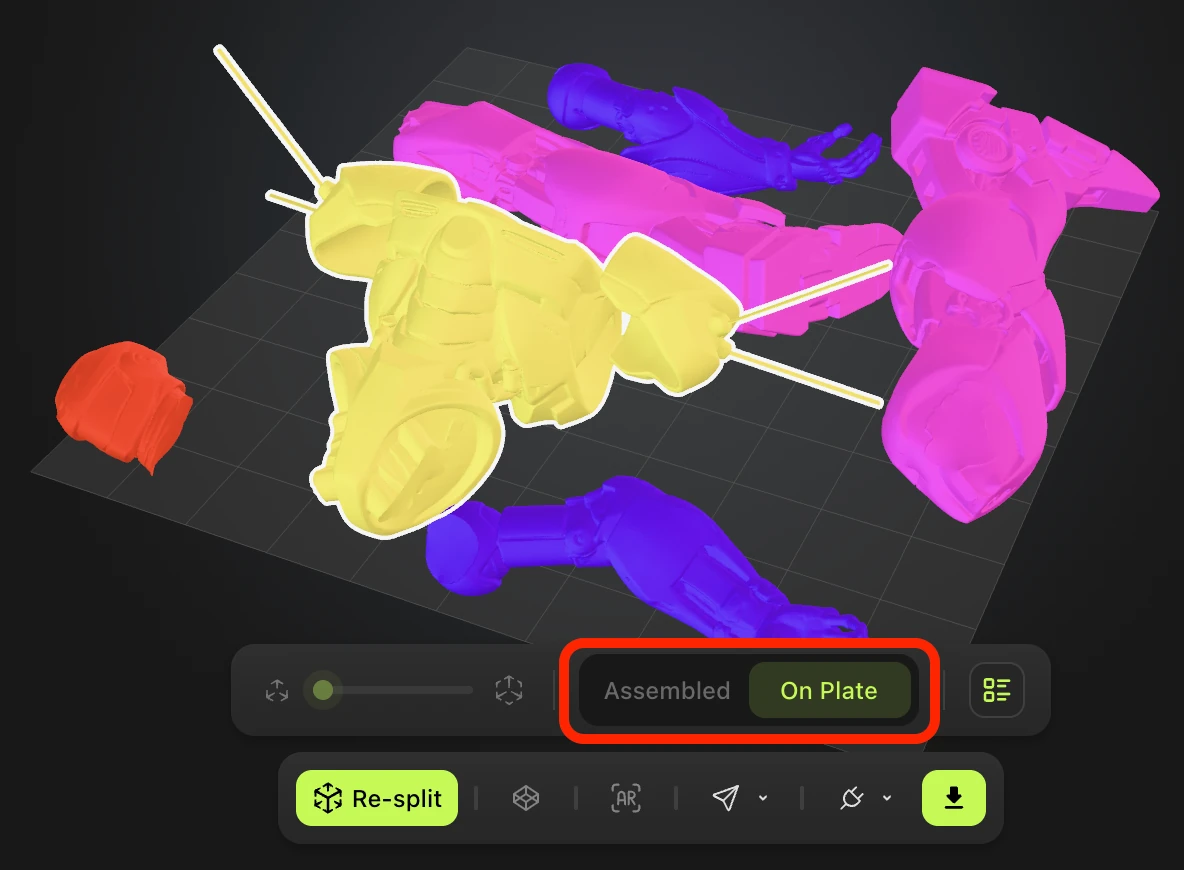
The Assembled/On Plate options allow you to see your model in whole, or split apart. Click "On Plate" to see your model dissembled in parts on the grid:
This button allows you to toggle the color coding window in the upper right corner.
"Re-split" allows you to split your model parts again, to how the user sees fit. There are two options when clicking this button:
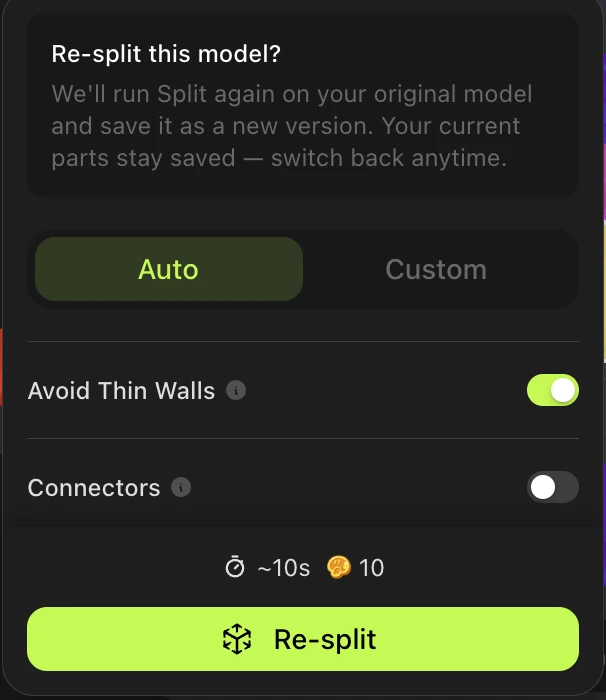
Auto will split the model again automatically, without any user prompt. Users can toggle "Avoid Thin Walls" to thicken thin surfaces, and "Connectors" to add connectors to each cut surface and customize the shape/size:
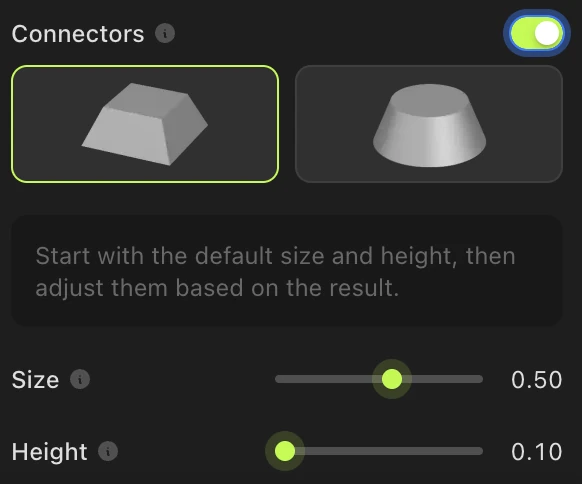
You can refer to the tutorials article to know more details about splitting.
How many credits does Auto Split cost?
Each Auto Split generation costs 10 credits. If you'd like to retry a generation, keep in mind that each attempt will also consume 10 credits.
FAQ
1. Can Auto Split handle textured models?
Not yet. Auto Split currently works only on Standard, untextured (draft) models generated with Meshy 6 and Meshy 7. Support for textured models is planned but not available today.
2. Do I need to repair the parts before slicing?
No. Every cut is automatically capped into a watertight mesh, so you can send parts straight to Bambu Studio, OrcaSlicer, or ElegooSlicer without extra repair steps in Blender or Meshmixer.
3. Can I change the split if I don't like the result?
Yes. Auto Split is non-destructive, so you can re-run it as many times as you like. Each attempt takes about 40 seconds.
4. Does Auto Split work with Low Poly models?
No. Auto Split only appears for Standard model type generations on Meshy 6 and Meshy 7 — it isn't available for Low Poly or other model types.